2x4 Bench Plans Free
Building a sturdy and affordable bench using 2x4 lumber is a fantastic project for beginners and seasoned woodworkers alike. This guide will walk you through every step, from gathering materials to finishing touches. Whether you're creating this outdoor seating project or just need a simple bench, these plans are perfect for you.
What You Need
Before starting, gather your tools and materials. Here’s what you’ll need:
Tools:
- Tape measure
- Speed square
- Miter saw (or circular saw)
- Drill with bits
- Kreg pocket hole jig
- Clamps
- Sandpaper (80, 120, and 220 grit)
- Paintbrush or stain pad
Materials:
- 2x4 lumber (8 pieces)
- Deck screws (2.5-inch and 3-inch)
- Wood glue (I recommend Titebond III)
- Joist hangers (optional for extra support)
- Finish of choice (Minwax stain or Thompson's WaterSeal for outdoor use)
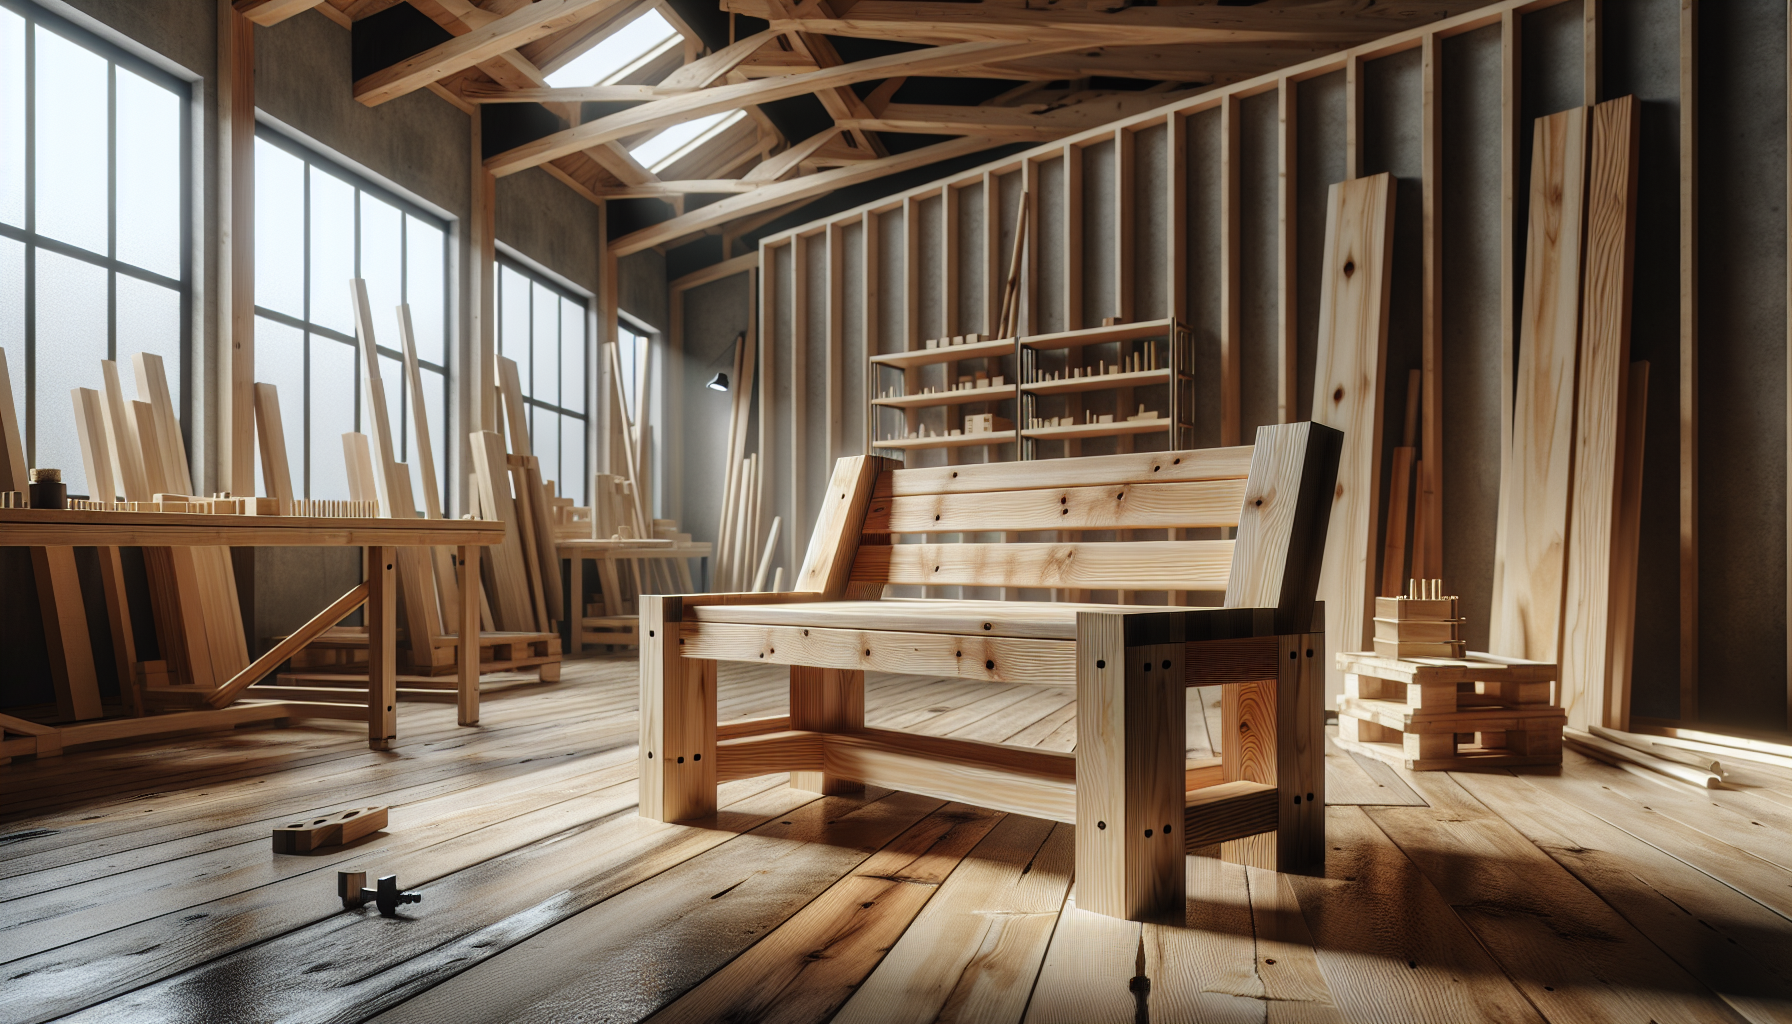
Materials & Cut List
Here’s the exact cut list for this project. Measure twice, cut once!
| **Part** | **Qty** | **Dimensions (inches)** | **Notes** |
|---|---|---|---|
| Legs | 4 | 17.5 x 3.5 x 1.5 | Cut at 15-degree angle at bottom |
| Seat Supports | 2 | 48 x 3.5 x 1.5 | Full length of 2x4 |
| Seat Slats | 5 | 48 x 3.5 x 1.5 | Space evenly 0.5 inches apart |
| Braces | 2 | 14.5 x 3.5 x 1.5 | Diagonal cuts at ends |
| Cross Supports | 2 | 14 x 3.5 x 1.5 | Connects legs |
Step-by-Step Assembly
Cutting the Pieces
Using your miter saw, cut all pieces according to the cut list. For the legs, make a 15-degree angle cut at the bottom for stability. At this step, you’ll notice the grain direction—align it vertically for strength.
Building the Frame
- Attach the cross supports between the legs using 3-inch deck screws and wood glue.
- Secure the seat supports to the top of the legs, ensuring they’re level.
Adding the Seat Slats
- Space the seat slats evenly (0.5 inches apart) and attach them to the seat supports using 2.5-inch deck screws.
- Pre-drill holes to prevent splitting.
Installing Braces
- Attach the braces diagonally between the legs and seat supports for added stability.
- Use pocket holes for a clean look, or screw directly for simplicity.
Finishing
Sand the entire bench starting with 80-grit sandpaper, then move to 120 and 220 for a smooth finish. Apply your chosen finish—I recommend Minwax stain for indoor benches or Thompson's WaterSeal for outdoor durability. My neighbor's version uses a bold red stain, which looks amazing!
Common Mistakes
- Uneven Legs: Always double-check your cuts and angles. I learned the hard way that uneven legs make the bench wobble.
- Splitting Wood: Pre-drill holes before screwing to avoid cracks.
- Incorrect Spacing: Use a spacer block to keep seat slats evenly spaced.
FAQ
Q: Can I use treated lumber for this bench?
Yes, but ensure it’s kiln-dried to prevent warping.
Q: How much weight can this bench hold?
Properly built, it can hold up to 400 lbs.
Q: Can I make this bench longer?
Absolutely! Adjust the seat supports and slats to your desired length.
Q: Do I need a Kreg pocket hole jig?
No, but it makes the project cleaner and easier.
Q: What finish is best for outdoor use?
Thompson's WaterSeal is excellent for weather resistance.
Q: Can I add a backrest?
Yes, check out our related plans for a bench with a back.
Want 16,000 More Plans?
If you’re hooked on woodworking and want to explore more projects, check out Teds Woodworking. With over 16,000 plans, you’ll never run out of ideas!
Written by Mike Carpenter, woodworker since 2009. Last updated February 2026.

Reader Comments (4)
Oh, this brought back such happy memories! My grandson and I built a bench just like this last spring for my front porch. It's held up beautifully through the rain and sun. I especially loved how the instructions clearly explained how to get those angled cuts for the legs; that was the trickiest part for me at first, but it turned out perfect. It's so rewarding to sit out there with my tea on something we made ourselves! Thank you for the wonderful plans.
👍 29JimBuildsThings: Awesome plans! I just finished one of these and it's rock solid. One thing I did differently was add a couple of pocket hole screws to join the stretchers to the legs; felt a bit sturdier for me. Also, if you're planning on painting or staining, do it *before* you assemble. Much easier to get into all the nooks and crannies. Great project for the weekend!
👍 21Marcus T.: Solid plans for a quick build. The angled cuts for the leg braces are the right way to go for strength, saves you from adding extra hardware. Looks like a good weekend project for customers wanting a basic outdoor seat without breaking the bank. I'd recommend pre-drilling everything to avoid splitting, especially if you're using cheaper pine.
👍 25Pete_DIY: These look like great plans for a simple weekend project. I'm curious about the specific dimensions for the leg braces – the diagram shows them angled, but can you confirm the exact length of each side of the triangle formed by the cut? Also, what type of screws are you recommending for assembly, and do you suggest pre-drilling for all connections to prevent splitting the 2x4s?
👍 4Share Your Build